This is officially my first blog post ever and I am super excited.  I am relying heavily on my friends, Caffeine and Spell Checker to get me through this piece of writing. Writing is something I do often…if you count the grocery lists that I compile to feed my family.

As I am receiving a lot of orders for axe sheaths at the moment, I thought that I would run through the basics of making an axe sheath.  This will not be in the form of an in-depth tutorial, but rather a run through, with a few images, of the steps I use when making an axe sheath, or almost any other sheath for that matter.

Making anything by hand takes time. Sometimes a lot of time.  There is something incredibly awesome, satisfying and therapeutic about making things with your own two hands. It is super empowering to create.  We are meant to create.

So here we go…my run through of making an axe sheath.


Choosing leather

When I first started out, I had NO idea of leather thickness (usually measured in ounces) and where to use what type of leather.  My very first hide was as thick as a Dunlop tyre that I actually made a wallet from ….  but never used as a wallet.  It is doing a great job as a door stop though.

When making sheaths and holsters, or anything that carries metal that can rust, I only use veg tanned leather. It is said that the chromium salts in chrome tanned leather erode metal, but there is more than one view on this.  For safety’s sake, I stick to veg tanned leather. I also prefer the look and feel of veg tanned leather over chrome tanned leather in general. Maybe my next blog should be on the differences between these two types of tanning and what these leathers are best suited for.

In terms of thickness, I tend to stay between 2,2mm and 3mm (6 to 7 ounces) for most axe and knife sheaths. This weight, or thickness, is great for molding/forming while strong and thick enough to produce a great sheath.

Patterns are important

I have a small pile of half made leather pieces in my office. Because who needs a pattern, right?

The first step is to have an idea of what it is that you want to make – in terms of looks, leather thickness and functionality. Drawing patterns can take up quite a bit of time sometimes, but without a proper pattern, you end up using a lot of very bad words and throwing away your expensive leather.

So don’t be me. Take an hour, or ten, and draw the pattern.

Prepping leather

Depending on the leather I use, I normally clean the surface with a quick brushing and sometimes I will even clean it with alcohol if it seems oily or stained.

Once I am happy that it is clean enough, I would then transfer the pattern onto the leather and cut it out.  At this point I usually apply a layer of oil to the top side of the leather and allow it to dry for about 20-30 minutes. For thin leather I skip this part, as the oil can easily seep through all the way into the rough side of the leather, leaving it unusable.

The reasons I oil my leather before dyeing is firstly it nourishes and softens up the leather and secondly it allows for the dye to go on more evenly.

Dyeing

The thing about dying that got to me in the beginning was that you can have two pieces of leather from the same hide, that end up different shades of the colour you chose to dye with. Now, I see it as the beauty of the leather. It is never perfect, and that is cool.  The Japanese call this “WABI-SABI”. The beauty in imperfection.

There are a number of different types of leather dyes. Some people prefer a water-based dye, as it will not harden the leather as much as alcohol dye. Some prefer oil and alcohol dyes. I have even seen guys dye leather with wood stain, coffee, tea and baking soda. They all seem to work well.

The downside to water-based dyes is that it takes way longer to dry. If you need to apply two or three coats of water-based dye, you are looking at about two days of drying time. I prefer alcohol dyes as it dries a lot faster, but the downside to this type of dye is that it stiffens the leather somewhat, if not oiled well.

When I dye my veg tanned leather, I use two coats of alcohol dye, that I apply (in a circular motion) with a piece of cotton wool.  I usually apply the first coat of dye around 30 minutes after oiling. This sits in an airy spot for one to two hours.  Then the second coat goes on with another one to two hours of drying time.

Some clients prefer the inside of the hide rough. Most, however, prefer it dyed and smoothed out.  For this I simply apply the dye to the inside and once I am happy that it is dyed evenly, I apply a smoothing cream to the surface. This then gets burnished with a glass burnishing tool and set aside for drying.

As you can see there is a lot of waiting and drying in between all the steps.

At this point it is usually time to have a big, strong cup of java.

putting things together

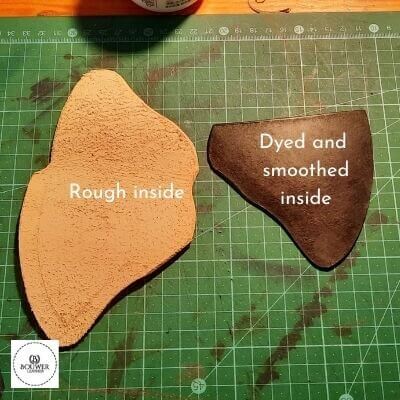
Now that everything is dry, it is time to assemble the project.

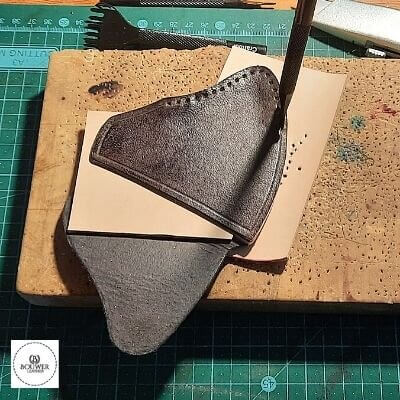
In the case of this axe sheath, and any other sheath that carries a sharp blade, I start by gluing in the welt on the bottom section of the sheath. This is to prevent the blade from cutting through the stitching.  Once it is secured, I glue on the top section and allow a little bit of drying time.

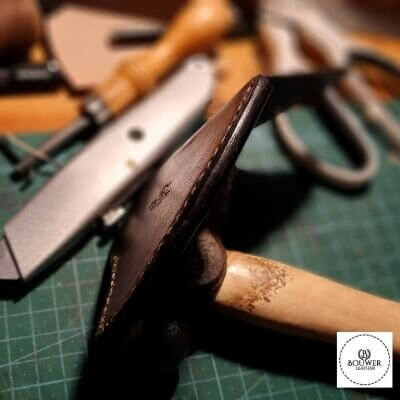
Now that the pieces are glued together, I need to make sure that the edges are neat, smooth and lined up. This is important at the end when I burnish the edges to a smooth shiny finish. This is usually a process of trimming and sanding till all the edges are smooth. When I am satisfied that all is well, I grab my stitching groover to mark out the stitching lines.

The stitching holes are then carefully tapped in with a a stitching prong, neatly following the stitching line.

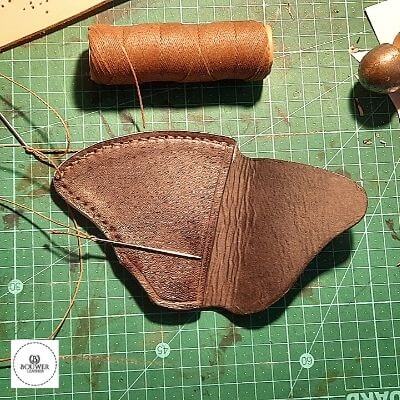
All my sheaths are hand stitched. I love the look of a hand stitched leather product, and hand stitching is far superior to machine stitching.  The stitch that I am using in this project is called a saddle stich. It is a stitch where the thread has a needle on each end.  Each needle goes through each hole from opposite directions – crossing each other in every hole.  At the end I normally back stitch three holes and melt the ends to make sure they do not pull back through the holes.

finishing touches

After stitching it is time to burnish the edges and seal the sheath.  Firstly, the edges are rounded by using an edge beveller. Then a little more sanding – up to about 400-600 grid, till it is super smooth.

The edges are now dyed and burnished. I apply either water or a smoothing cream to the edges and burnish it with a wooden burnishing tool.

We are almost done now. Lastly, I apply either a final coat of oil or a sealer to make it a bit more weatherproof..

….and then…. happiness.

In conclusion

So, this was a short first blog post.  I was told to write between 2000 and 6000 words for this blog, but I am somewhat of a rebel, and I have to finish a Leatherman pouch.  Maybe next time.

I hope that you enjoyed this summary of “The making of a Leather Axe Sheath”.

Always keep it simple. Always keep it true.

Paul